Sunday, April 21, 2013

"Dos Coyotes": my latest Southwest-inspired work

This piece began as a commission but then the clients took some time out to think about it. I believed in this design so much that I went ahead and created it anyway. 
I envisioned a cave painting, kind of rough and not fussy. I also wanted to stay away from the typical coyote art: the lone howling animal silhouetted against the full moon. However I always like to give a nod to artistic cliches so in this piece you WILL see a howling coyote and a full moon! 
The two coyote images reminds me of Janus, the god of doors, usually depicted as a two-faced image, one looking forward, the other backward. 
"Dos Coyotes"
36" x 24"
mirror, glass, tile, ceramic
April, 2013


"Unfurled" - a Mosaic Mural in Charlotte, NC

Recently I was one of many mosaic artists invited to be a part of a large mosaic mural headed by Pam Goode, who owns Ciel Gallery in Charlotte, North Carolina. The design consists of 3 large art-deco-ish flowers designed by Lin Schorr, of Novi, MI. 
My piece is a petal, numbered 2G. We were asked to create our mosaics on mesh using glue. It is approximately 19" across and was specified to consist of the colors, yellow, orange, pinks with hits of purples. So here is my interpretation:
This mural was installed during the Fall of 2013. And here it is finished:


Here are the final dimensions: Flower #1 is 7'1"H x 4'5"W. Flower #2 is 7'11"H x 4'6"W. Flower #3 is 6'7"H x 5'1"W.

Monday, March 11, 2013

The RIver of Life mosaic mural is finished!

This latest work is in the Unitarian Church of Berkeley, California. 
 As with my Tree of Life project at this church two years ago, the congregation was asked to bring in pieces of their lives - like pottery, jewelry, charms, bottle caps, beach glass, shells, mugs, etc - to be included in this piece. Each person wrote a little note explaining their offering. Some examples:

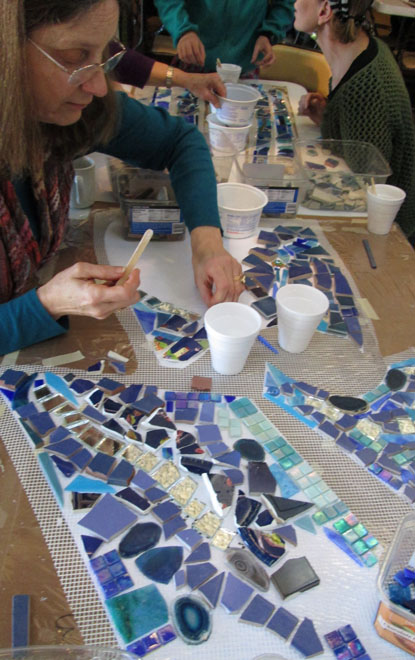
 Over the course of three Sundays this past winter, I led three mosaic workshops where the participants were asked to mosaic, using their pieces as well as miscellaneous tiles and objects, large shapes (on mesh) that I then put together into the large river design. 
 Here is the simple design and color-scheme:
There are 8 rocks in this river, each one representing a step along a spiritual path. 
 The previous post showed photos and explained the beginning of the process. This post continues the story! 
This piece has 6 different colors of grout so I ended up making one small pot of color at a time, rather than one large bucket of color. I began the grouting at the top left corner.
The installation took 6 days and the grouting took 9 days. I worked on a two-story scaffold for much of the time. 


My fingers took a beating too. 
This piece is 110 square feet on a light blue wall measuring 250 square feet.


Below are a few more notes with photos of where the objects are in the mosaic.


And finally, here it is again: 
The River of Life Mosaic Mural   
110 square feet
March, 2013
Unitarian Church of Berkeley California, 
1 Lawson Road
Kensington, CA

Wednesday, February 6, 2013

River of Life Mosaic Project Begins

This is the third mosaic project I have led at the Unitarian Church of Berkeley, California. These folks are getting to be real pros at this!
 The theme for the latest mural is River Of Life. I was offered a second story wall over a breezeway area that is approximately 247 square feet. As you can see in the picture, there are stairs on the right side. So I designed the "River" to begin up in the left hand corner and trail off down to the right hand lower corner. I will be working on scaffolding. Not my favorite thing but I have done it before and this scaffolding has stairs and is very sturdy.
The Co-Ministers, Barbara and Bill Hamilton-Holway, wanted to do a series of sermons on spiritual practice. Their theme was "8 Stepping Stones on the Spiritual Journey: Show Up, Practice, Grow, Serve, Go Forth, Give, Create and Love". And therefore there are 8 stones in my river design.
 A simple idea and a simple design. But I knew I wanted to challenge this congregation with a little more difficult production than last time. I wanted to make the leaf-making for the Tree of Life mural seem like arts and crafts. The total size of the design is about 110 square feet. I always design on my computer and have it printed out full size. The above picture a partial view of the art. Each section is labelled, numbered and named. For this project I cut each section out, prepared it for mosaicking on mesh and arranged each section by color. Below is a photo of the pile of pieces ready to go:
The congregation had again donated all kinds of tessarae for this project. And it was my job to divide them up by color and texture and call out which colors would go on which sections of the mural. Each box, in photo below, is labelled to correspond by color with specific  sections of the mural.
So far there there have been two workshops - each held after the Sunday service. This Sunday is the last one and I only have a few odds and ends for them to finish. 
My goal was to have people working together on these larger pieces - using only the tessarae that was right in front of them. People worked shoulder to shoulder. I wanted to control the flow and blending of the color of the "water" as it flows down and around the "rocks". 

 This is a TOTAL experiment for all of us - me included. When these pieces are cut apart and worked on separately, it is very hard to know if my idea is coming together or not. So I have to rely my organizing skills and then just move ahead on a wing and a prayer! Here are the finished pieces, cut apart, organized by section and ready to be installed:


I am also making mosaic pieces myself out of the more special tessarae, like jewelry, watches, rings, gemstones, etc.


All in all there might be about 90 sections I will be installing. It sounds daunting but I am excited to get started and to see if my vision of this mural can come true!


Tuesday, January 8, 2013

Rooster Mosaic Backsplash

I have wanted to make rooster mosaics for a while. I was recently contacted by a gentleman, for whom I had made a mosaic fireplace surround 5 years ago, to create a new piece to go behind his stove. He was redesigning his kitchen in a black-and-white motif, sort of a "bistro" theme. His floor is black & white and the cupboards and walls are bright white. Well, when I Googled "bistro" a lot of rooster art came up! So I designed this piece: a simple white tile background with 6 tiles with a grey-metallic finish and 4 solid black tiles. The centerpiece is a glass mosaic rooster. I really like how this came out. 
Here are photos of the process:
First the design. I laid out the tiles on a mockup of the space. 
 Then I cut the rooster out of Wedi board. I don't like the "strings" that stick out of the sides of the Wedi but I do like how easily it cuts. 
Here it is finished in my studio and ready to be packed up to go to the job site:
  Next step, the installation! Here is the space "before".
Here is the space "after". 
You can see the substrate nailed to the wall by the contractor. I tape all around and put tarps on the floor to protect all the new white paint. 
The install begins. 
I held up the tiles with blue tape to keep them from sagging. I didnt want to use quick-setting adherent because I wanted to be able to measure and level each row and shift the tiles if necessary. 
And here it is at the end of the first day. 
 Second day - grouting!
 Again, taping everything around the piece is essential.
 Almost clean!!
I went back to seal this a few days later and the stove was in place. Here she is finished! 
I think I am going to keep making rooster mosaics. I really like the image and "feel" of roosters and chickens. 
 
Rooster Mosaic Backsplash
34" x 36"
2013

Thursday, December 13, 2012

The Buggy Garden - Mosaic Mural

Okay she's finished! The previous posts have described this piece and my process. This is a mosaic commissioned by Nancy at Hug A Bug Preschool in El Cerrito, California to commemorate her 30th year in business. We held a mosaic workshop in her home where 15 parents each made a "bug" to be incorporated into this mosaic mural. 
The final size is 6' x 3'. Begun 11/17/12. Finished 12/13/12. 
This piece is meant to depict a surreal garden. I let my imagination go while I worked on the "flowers".
 Here are the "bugs" flying around this garden:
When I first arrived on site 4 days ago I took this "before" picture:
And here is the "after" picture:
 This is my name tile in the corner. Can't forget that!
Here she is again:

The Buggy Garden
6 ft x 3 ft
12/13/12
©Kim Larson